
A production schedule template is your studio's game plan, a complete, customisable system for wrangling the entire post-production workflow. Think of it as the foundational document that tracks every task, deadline, and resource, making sure your projects stay organised, on schedule, and crucially, within budget. It's the leap from a basic to-do list to a dynamic, powerhouse project management tool.
Why Generic Spreadsheets Are Costing Your Studio

Post-production is a high-stakes balancing act. You're juggling tight deadlines, artist availability, and a constant stream of client feedback. Trying to manage all that with a generic spreadsheet is like trying to conduct an orchestra with a stopwatch—sure, it tracks time, but it completely misses the harmony and flow. This approach quietly drains your studio's profitability and morale through hidden costs you might not even be tracking.
The big problem with static schedules is that they're outdated almost as soon as you make them. Producers end up burning hours chasing down updates, digging through email chains, and manually flagging dependencies. This isn't just inefficient; it’s a direct hit to the project's bottom line.
The True Cost of Inefficiency
The real pain of a makeshift system always hits hardest during crunch time. Picture this: your lead VFX artist is double-booked because their availability wasn't updated in the master sheet. Or a crucial render farm is already tied up, creating a bottleneck that shoves the entire delivery timeline back. These aren't just minor hiccups; they're serious operational failures.
These issues feed directly into your P&L through:
- Resource Clashes: Overbooking your top talent or essential equipment leads to delays and, often, rushed work that just isn't up to standard.
- Blown Budgets: Without a live link between tasks, hours, and costs, it’s practically impossible to know where you stand financially until it’s too late.
- Team Burnout: The constant stress of putting out preventable fires and chasing information wears people down, killing creativity and morale.
A purpose-built production schedule template acts as your studio's central nervous system. It’s not just about listing tasks; it's about creating a predictable, transparent, and resilient workflow that everyone can trust.
To help you build a more robust system, we’ve broken down the essential components that turn a simple task list into a powerful studio management tool.
Key Components of an Effective Post-Production Schedule
A quick look at the essential elements that elevate a simple task list into a powerful studio management tool.
| Component | What It Solves | Example Fields |
|---|---|---|
| Project & Task Details | Ambiguity and miscommunication about what needs to be done. | Project Name, Task ID, Task Description, Shot Code, Status |
| Timelines & Dependencies | Bottlenecks and missed deadlines from out-of-sequence work. | Start Date, End Date, Duration, Dependencies (Predecessors) |
| Resource Allocation | Overbooking artists, double-booking suites, and team burnout. | Assigned Artist, Resource (e.g., Edit Suite 1), Department |
| Budget & Cost Tracking | Going over budget without real-time visibility. | Estimated Hours, Actual Hours, Rate Card, Total Cost |
These elements work together to give you a complete, 360-degree view of every project, helping you anticipate problems before they happen.
Gaining Control with a Structured Approach
A dedicated production schedule template solves these problems by creating a single source of truth for everyone. It’s about building a workflow that is predictable and transparent, empowering your team and boosting client confidence. Ultimately, proper scheduling is a form of proactive risk management. For a deeper dive into how this connects to resource management, it's worth exploring the fundamentals of capacity planning—a core concept for truly optimising your team's workload.
This structured approach is essential in any production environment, where adaptability is everything. For instance, recent UK manufacturing data highlighted a 1.7% decrease in output in just one month, a stark reminder of the volatility businesses face. You can see more on these economic trends from the Office for National Statistics. While post-production isn't the same as manufacturing, the principle holds true: robust scheduling is your best defence against unpredictable variables.
Building Your Template From the Ground Up
A great production schedule is so much more than a list of tasks and due dates. To build a template that actually works for a post-production team, you need to think about the data that drives decisions. It’s not about creating a simple to-do list; it’s about designing a data-rich environment that flags risks before they become problems.
Let’s take a common scenario: a 30-second commercial VFX project. This kind of job usually involves multiple artists, several rounds of client feedback, and some pretty unforgiving deadlines. A generic project plan might just have line items for "Animation" and "Compositing." A truly useful production schedule template, on the other hand, breaks these down into granular, trackable pieces.
Defining Your Core Data Fields
The real power of your template is in its columns. Each field you add should answer a critical question about the project's health. Don't think of it as tedious data entry—think of it as building the dashboard for your entire project.
Here are the absolute non-negotiables your template has to have:
- Task Name: A clear, concise description of the work (e.g., "Shot 03 - Roto BG Characters").
- Assigned Artist: Who, specifically, is responsible for getting this done? Naming a person cuts through any ambiguity.
- Department: Which team does this fall under (e.g., VFX, Sound Design, Colour)? This is essential for filtering your schedule and planning resources.
- Start & End Dates: The planned window for the task. This is the absolute backbone of your timeline.
That's a decent start, but to really get ahead of bottlenecks and manage expectations, you need to dig a bit deeper.
Advanced Fields for Proactive Management
This is where your template goes from being a passive tracker to an active management tool. By adding fields that monitor progress and resource burn, you can spot trouble long before it threatens a delivery date. Let’s add the columns that give you real control.
Task Status
Forget a simple "Done" or "Not Done." A more nuanced status field gives you instant clarity and drastically cuts down on those "just checking in" meetings.
- Not Started: The task is in the queue, but work hasn't begun.
- In Progress: The artist is actively working on it right now.
- Awaiting Feedback: The artist has finished their part, and it's now with a supervisor or the client for review.
- On Hold: Work has stopped because of an external blocker, like waiting on a new plate from the client.
- Approved: The task is finished, signed off, and dusted.
With a clear status system, a producer can scan the schedule and see exactly where every single shot is at, all without interrupting the creative team.
A well-defined 'Status' field is the single most effective way to cut down on unnecessary meetings. It replaces the "just checking in" email with a live, transparent view of the project's momentum.
Estimated vs Actual Hours
This pairing is probably the most critical one for the financial health of your project and for making your future bids more accurate.
- Estimated Hours: The time you budgeted for the task during the initial bid.
- Actual Hours: The real time spent on the task, pulled from timesheets or logged daily.
When you track these two metrics side-by-side, the value is immediate. Say a task was estimated for 8 hours, but you see 10 hours have already been logged and it’s still "In Progress." That’s a massive red flag. It’s an early warning that you’re about to go over budget, giving you a chance to talk to the client or shift resources before it’s too late.
Dependencies
Finally, the 'Dependencies' field is what truly brings your schedule to life. It creates a logical flow, showing how one task connects to the next. This column simply lists the ID of any task that has to be completed before the current one can kick off. For instance, "Shot 03 - Compositing" can't start until "Shot 03 - Roto BG Characters" is marked as approved.
Mapping these relationships is vital. It makes sure artists aren't left waiting for assets and stops people from working out of sequence, which always leads to wasted time and effort. This is the foundational logic we’ll use to build the visual timelines and Gantt charts we're covering next, turning your sheet of data into a clear, actionable roadmap.
How to Visualise Your Entire Post-Production Workflow
A detailed list of tasks is just raw data. What you really need is a visual timeline—something that tells a story everyone in the studio can understand in a heartbeat. Once you’ve nailed down your core fields and dependencies, the next move is to translate all that information into an intuitive visual workflow. This is where tools like timelines and Gantt charts come in, transforming your template from a static document into a dynamic roadmap.
This visual approach is absolutely essential for getting a feel for the project's flow. It lets a lead producer, a freelance artist, and even the client see exactly how their piece of the puzzle fits into the bigger picture. Instead of guessing what’s next, the entire team can see the project's momentum at a glance.
This is the logical progression for building a solid production schedule template, from defining your core fields all the way to mapping out dependencies.
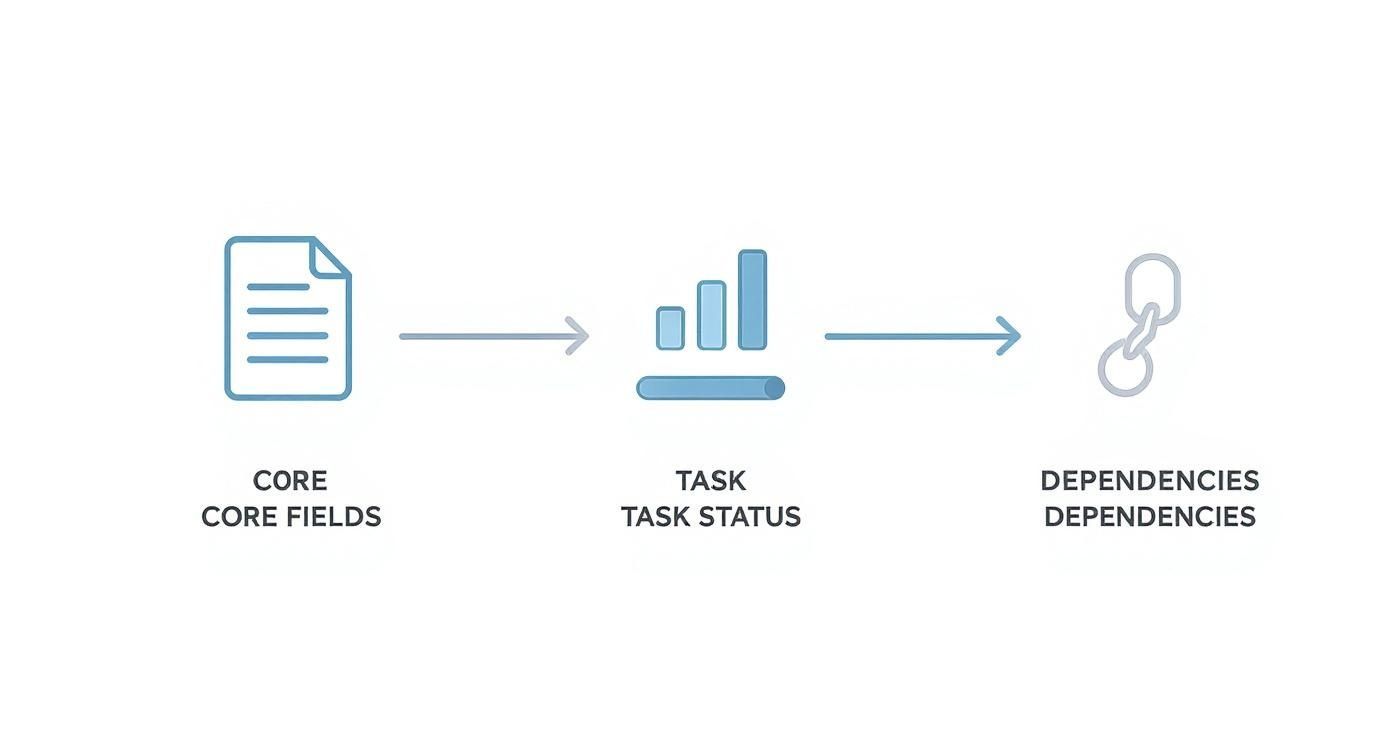
The visual flow makes it clear: establishing strong data fields is the foundation for everything else, including task visibility and the logic of your workflow.
Setting Up Dependencies That Make Sense
The real power of a visual schedule comes from enforcing workflow logic through dependencies. This is how you make sure the ‘Colour Grade’ task can't possibly kick off until the ‘Final Edit Lock’ is complete. It’s a simple rule, but it prevents catastrophic errors and a whole lot of wasted effort.
In practice, you’re creating a chain reaction. When setting up your template, just think about the natural order of things in any post-production project. For instance, on a short animated film, the workflow might look something like this:
- Ingestion & Dailies: This has to happen before anyone can even think about editing.
- Offline Edit: This phase must be done and signed off before VFX work can be finalised.
- VFX Shots: These can run alongside the offline edit, but they need to be wrapped up before the final conform.
- Sound Design & Mix: Often happens at the same time as colour grading, but you absolutely need a locked picture to finalise the mix.
By linking these tasks, you build a system that adjusts itself. If the offline edit gets pushed back by a week, every task that depends on it—from VFX to sound—automatically shifts too. This gives everyone an honest, real-time look at your delivery date, without someone having to manually recalculate a dozen different deadlines.
Mapping Project Phases with Gantt Charts
A Gantt chart is hands-down the most effective way to visualise this web of interconnected tasks. It lays everything out with horizontal bars representing how long each task will take, all plotted against a calendar. This format makes it incredibly easy to spot task overlaps, the total project duration, and those all-important dependencies.
If this is a new concept for you, our guide explains in detail what a Gantt chart is used for and how it can bring clarity to even the most complex projects.
The whole point of visualisation is to create a single source of truth that communicates the project’s status without needing a meeting. It should empower every single team member to understand their immediate priorities and see how their work impacts the rest of the pipeline.
Highlighting Milestones and the Critical Path
Within your Gantt chart, it’s vital to flag key milestones. These aren't really tasks; they're major checkpoints in the project, like 'Client Review 1', 'Picture Lock', or 'Final Delivery'. Milestones have zero duration but act as clear signposts that show you're making progress.
What’s more, a Gantt chart helps you pinpoint the critical path. This is the longest string of dependent tasks that directly dictates the project's final end date. Any delay to a task on this critical path will, without a doubt, delay the entire project.
By visualising your workflow, you’re doing more than just organising tasks. You’re building a strategic overview of the entire post-production process, making it predictable, manageable, and transparent for everyone involved.
Connecting Resources and Budgets to Your Schedule

A schedule that lives in a vacuum is a recipe for disaster. If it doesn't account for your team's actual capacity or the project's budget, it's not a plan—it's just a wish list. This is where we bring your people and your pounds into the picture, turning your template into a command centre for your entire operation.
Think of it this way: your production schedule template goes from being a simple calendar to a dynamic tool that shows the true health of a project. Imagine seeing the financial ripple effect of three extra rounds of client changes, simply because your editor's day rate is wired directly into their scheduled tasks. That’s the kind of clarity we're aiming for.
Mapping Team Resources and Capacity
First things first, we need to stop thinking of resources as just names on a list. They are finite, valuable assets. This means getting granular and assigning specific artists, sound engineers, or even physical edit suites to individual tasks in your schedule.
To get started, add a dedicated ‘Resource’ or ‘Assigned To’ column. From there, you can start mapping everything out.
- Assign Key Personnel: Tag the lead compositor for that tricky VFX shot or the specific colourist the client loves. This builds in accountability right from the start.
- Book Physical Assets: If a job needs the main grading suite or the only audio booth, schedule it just like you would a person. Don't let a double-booking derail your delivery.
- Flag Over-Allocations: This is a big one. Use conditional formatting to instantly highlight anyone assigned more than 8 hours of work in a day. That simple red flag is your best defence against team burnout.
This kind of proactive planning is absolutely essential, especially when top-tier talent is in high demand. It’s a challenge felt across industries; skills shortages are a constant headache. Even in manufacturing, a recent report found around 46,000 unfilled vacancies, forcing businesses to squeeze every last drop of efficiency out of their workforce. The exact same principle applies to post-production studios fighting for the best talent.
Linking Your Schedule Directly to Your Budget
Once you know who is doing what and when, the next move is to connect their time to actual costs. This is the step that elevates your schedule from an operational plan to a powerful financial management tool.
By linking task hours to your budget, you get a live, transparent view of a project's financial health. No more nasty surprises at the end of the month.
Building the Financial Connection
Start by creating a simple rate sheet within your template. List the hourly or daily cost for each team member and any key resources (like that expensive Flame suite). From there, you can use basic spreadsheet formulas to automatically calculate the projected cost of a task based on its duration and the assigned resource. For this to work well, it really helps to get your head around mastering resource allocation as a core skill.
The real magic happens when you compare "Estimated Cost" against "Actual Cost" every single day. This live feed is your early warning system. It lets you have those tough conversations with clients about overages before the project is deep in the red.
This process gives you an incredible amount of control. For a deeper dive into structuring your finances, our guide on https://freespace.com/blog/budgeting-and-reporting has some great frameworks you can adapt. When you weave these financial touchpoints into your schedule, it becomes the true hub for managing not just the timeline, but the commercial success of every single project.
Let Automation Handle the Grunt Work
A static schedule is a schedule that’s already out of date. Let’s be honest, manual updates are not just a chore; they’re a breeding ground for miscommunication and costly mistakes. The real magic of a modern production schedule template happens when you get it to work for you with a bit of smart automation.
By setting up a few simple but powerful rules, you can ditch the administrative drag that pulls your producers away from actual creative problem-solving. It’s all about creating a system that talks to itself, freeing your team from the endless cycle of chasing updates and playing telephone just to figure out where a project stands.
Setting Up Simple Automation Rules
You don’t need to be a coder to make this happen. Most modern project management tools let you build straightforward "if-this-then-that" rules to handle all that routine communication. The idea is to trigger notifications and actions automatically based on changes happening right there in the schedule.
Here are a few practical examples that will make a difference immediately:
- Status Change Notifications: Create a rule so that when a task's status changes to 'Picture Lock', it automatically pings the sound designer and colourist. They’ll know the final cut is ready for them to start their work, and the producer won’t have to send a single email.
- Dependency Alerts: Set up an automation that alerts an artist the moment a task they depend on is marked as 'Approved'. For example, as soon as the roto artist finishes their piece, the compositor gets an instant heads-up that their task is good to go.
- Overdue Task Reminders: Automatically flag any task that blows past its end date without being marked complete. This can trigger a daily reminder to the assigned artist and the project producer, making sure nothing slips through the cracks.
Automation isn't about replacing people. It's about getting rid of the mundane, repetitive tasks that stop them from doing their best, most creative work. It keeps your data current and communication flowing.
Integrating with Your Other Tools
The next step is to get your schedule talking to the other software your studio uses every day. When different systems can share data automatically, you create a single, synchronised source of truth. This is a fundamental principle of running a tight ship, and for anyone wanting to go deeper on this, it's worth reading up on unlocking efficiency with business process automation.
Think about linking your schedule with tools like these:
- Time-Tracking Software: By integrating with the tool where artists log their time, you can pull 'Actual Hours' data straight into your schedule. This gives you a live, accurate view of your budget without anyone needing to manually punch in timesheet data.
- Asset Management Systems: Hook up your schedule to your media asset management (MAM) platform. An automation could, for instance, create a new project folder in the MAM system the second a new project is added to the schedule. Your file structures will always be perfectly consistent.
This kind of interconnected setup is vital for staying nimble, especially when things are unpredictable. Recent manufacturing data showed a future output balance of +11%, hinting at a cautious but definite improvement in the UK sector. This really underscores the challenge of aligning production schedules with fluctuating demand—a scenario where automated, responsive planning gives you a serious competitive edge. You can find more insights on these UK manufacturing trends.
When you automate routine updates and integrate key systems, your schedule transforms from a static document into a dynamic, intelligent tool that actively helps you manage your projects.
Your Go-Live Checklist for Studio-Wide Adoption
A brilliant new system is useless if it just gathers digital dust. You've put in the work to design a killer production schedule template, but now comes the most important part: turning that clever idea into a powerful, studio-wide asset.
This final checklist is your roadmap for rolling out the new workflow. Getting this right is what makes your template an indispensable tool for the entire team, not just another thing they have to log into.
Successful adoption isn't about sending a memo and hoping for the best. It’s a thoughtful process, focused on showing real value and making the transition as painless as possible for everyone, from producers right through to freelance artists.
First, Secure Your Team's Buy-In
Let's be honest: the biggest hurdle to any new workflow is resistance to change. Your first job is to show your team exactly how this new template makes their lives easier, not harder. Frame it around solving their specific, day-to-day headaches.
- For Artists: No one likes waiting around for assets or being constantly interrupted by a producer asking for a status update. Highlight how clear dependencies and automated notifications mean less of that.
- For Producers: Emphasise the power of real-time budget tracking and resource visibility. This gives them the ability to spot potential overages long before they blow up into a serious problem.
- For Leadership: It all comes down to the bottom line. Showcase how accurate data and predictable workflows lead directly to more profitable projects and, crucially, happier clients.
The goal isn't to present this as another layer of admin. It’s a tool that actively removes friction from their day. When people see the direct benefit for themselves, they’ll actually want to use it.
Run a Pilot Project and Gather Feedback
Never, ever roll out a new system studio-wide in one go. That’s a recipe for chaos. Start small with a low-risk project as a pilot test. This gives you a safe space to work out any kinks and prove the template's value on a manageable scale.
Once that pilot project wraps, get candid feedback from the team who used it. Ask direct questions: What worked well? What felt clunky? What information was missing? Use their real-world input to refine the template before you even think about a wider launch. This collaborative approach doesn't just improve the final product; it makes the team feel invested in its success.
Finally, create simple, clear documentation. Forget dense manuals nobody will read. A short video walkthrough or a one-page guide is far more effective. Set clear ground rules for how and when the schedule must be updated and define who is responsible for each piece of information. This clarity is what stops the system from becoming outdated and unreliable.
A smooth, well-planned adoption is the final step in making your new production schedule a true cornerstone of your studio’s operations.
Got Questions? We've Got Answers
Even with the best template in the world, questions always pop up. Building a production schedule that genuinely works for your studio is less about a single perfect setup and more about a process of continuous tweaking. It's totally normal to wonder how to best bend the system to your team's unique way of working.
Here are a few of the most common questions we hear from producers and studio managers when they're rolling out a new scheduling process.
What’s the Best Format for a Production Schedule?
Honestly, the best format is the one your team will actually use. But if you're looking for the sweet spot, it's almost always a combination of a detailed data view and a visual timeline. Think a powerful spreadsheet that feeds directly into a Gantt chart.
This two-pronged approach gives you the best of both worlds:
- A detailed task list: The spreadsheet view is perfect for the nitty-gritty—who's assigned, how many hours are budgeted, what's the status?
- The big-picture workflow: The Gantt chart takes all that data and turns it into a clear visual timeline. You can spot dependencies and potential clashes a mile off.
A complicated system nobody touches is useless. A simple one that everyone keeps up-to-date is gold. Start there.
How Do You Handle Unexpected Client Revisions?
Let's be real: "unexpected" revisions are pretty much expected in post-production. The trick is to stop treating them like emergencies and start treating them like any other trackable task in your schedule. They're part of the job, not a spanner in the works.
When that email with new client feedback lands, your first move shouldn't be to panic. Instead, you just follow the process:
- Log it as a new task. Create a fresh line item for the revision, something specific like "Client Feedback R3 - Shot 05 Colour Grade Tweak".
- Scope the impact. How many hours will this take? Who's the best person for it? Get that assigned.
- Update the dependencies. This is the crucial bit. Link this new revision task to anything downstream that it affects.
Suddenly, that "quick change" is properly tracked against the budget, and its knock-on effect on the deadline is crystal clear to everyone. It shifts the conversation from a vague "can we do this?" to a professional "here's what's involved in doing this."
Think of your schedule as a living document. It shouldn't break when plans change; it should adapt and clearly communicate the consequences of those changes in real-time.
When you handle revisions this way, they stop being chaotic fire drills and become just another manageable, quantifiable part of the project.
Ready to build a schedule that eliminates bottlenecks and gives you complete control over your studio's resources? The freispace platform is designed for the unique demands of post-production. Explore how freispace can transform your workflow today.